Caramel malt brings a bold sweetness and rich aroma to beer, but not all caramel malts taste the same. In fact, roasting techniques play a crucial role in shaping the final flavour. Therefore, let’s break down how different roasting methods influence this essential brewing ingredient.
Caramel or Crystal? Two names, one malt
Caramel and crystal malt refer to the same specialty malt. In continental Europe and among many international maltsters, caramel malt is the preferred term, while brewers in the UK and US favour crystal malt.
Regardless of the name, this malt delivers sweetness, body, and colour to ales and lagers. The difference in terminology is purely regional – what matters most is the flavour it brings to the brew.
Sugar, heat, and moisture
Creating high-quality caramel malt relies on three key elements: sugar, heat, and moisture. The process starts with barley, which is first steeped and germinated to produce green malt. Then, while still damp, the malt undergoes saccharification at 60-80°C, breaking down starches into sugars. Once this transformation is complete, temperatures rise quickly to 110-165°C, triggering caramelization.
At 110°C, caramelization kicks in, as sugar oxidation creates sweet, nutty, and toffee-like flavours along with deep golden to dark-brown hues. Meanwhile, the Maillard reaction – starting as early as 60°C – develops malty, bready notes and a light tan colour.
Without the right balance of moisture, heat, and sugar, true caramel malt simply can’t develop. That’s why maltsters carefully control these factors to achieve the rich flavours and colours brewers crave.
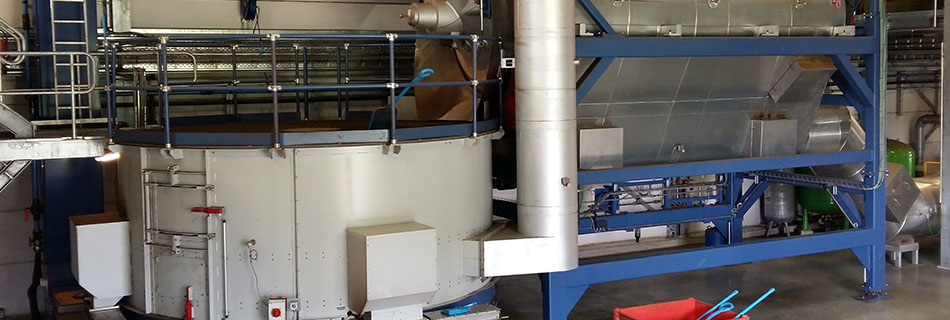
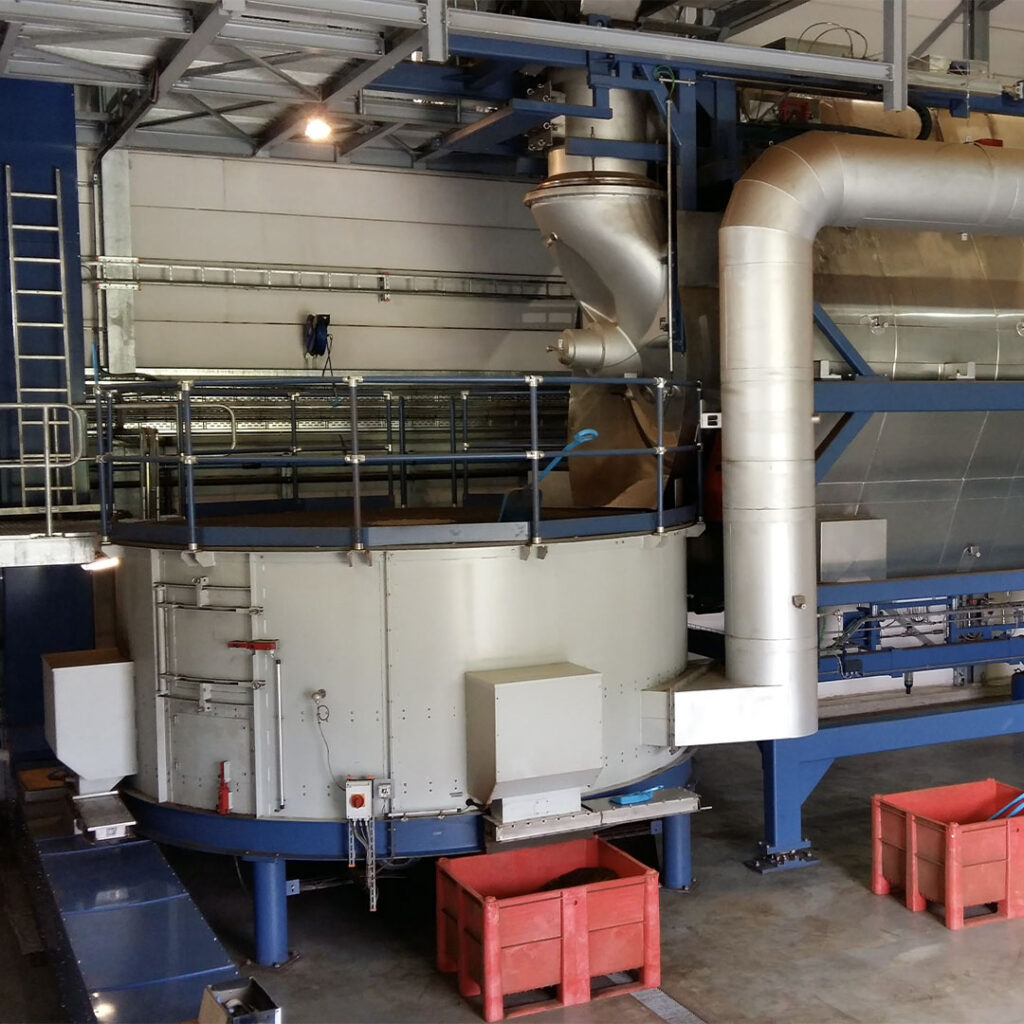
Sealed drum roasters – The gold standard
For the finest caramel malt, drum roasters are unmatched. These sealed, rotating drums ensure even heating and precise moisture control, ultimately creating an ultra-smooth caramel sweetness.
Why does this matter? Caramel malt starts with starch conversion, just like mashing in a brewery. Green malt must saccharify at 60-80°C, and that process requires moisture – something only sealed drum roasters provide consistently.
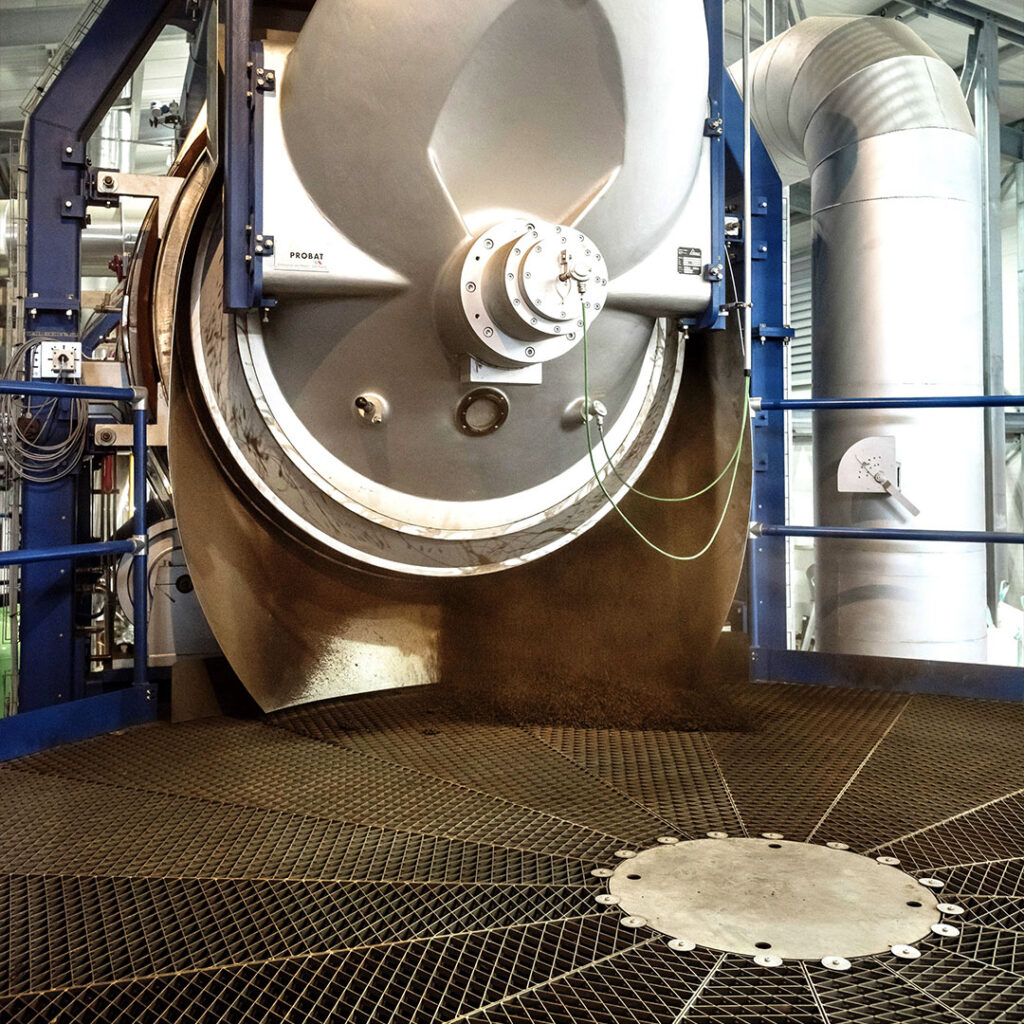
As a result, leading craft malt houses rely on drum roasting to achieve near-perfect saccharification and caramelization. While these roasters come at a higher cost, the result is top-tier caramel malt with deep, complex flavours.
Open roasters – A poor choice for caramel malt
Some maltsters use open coffee-style roasters for dry-roasted black malts, but these aren’t suited for caramel malt. First and foremost, coffee roasters lack the moisture control needed for starch conversion and caramelization. Even worse, they can release insulation particles into the malt, raising food safety concerns.
For any malt requiring moisture during roasting, coffee roasters simply won’t cut it. Instead, a closed drum roaster is a far better option.
Continuous coil roasters – Fast but limited
Continuous coil roasters offer speed and consistency, making them great for high-volume production. However, they don’t allow malt to spend enough time at saccharification and caramelization temperatures. Consequently, the result is a simpler caramel malt with less depth and complexity compared to drum-roasted versions.
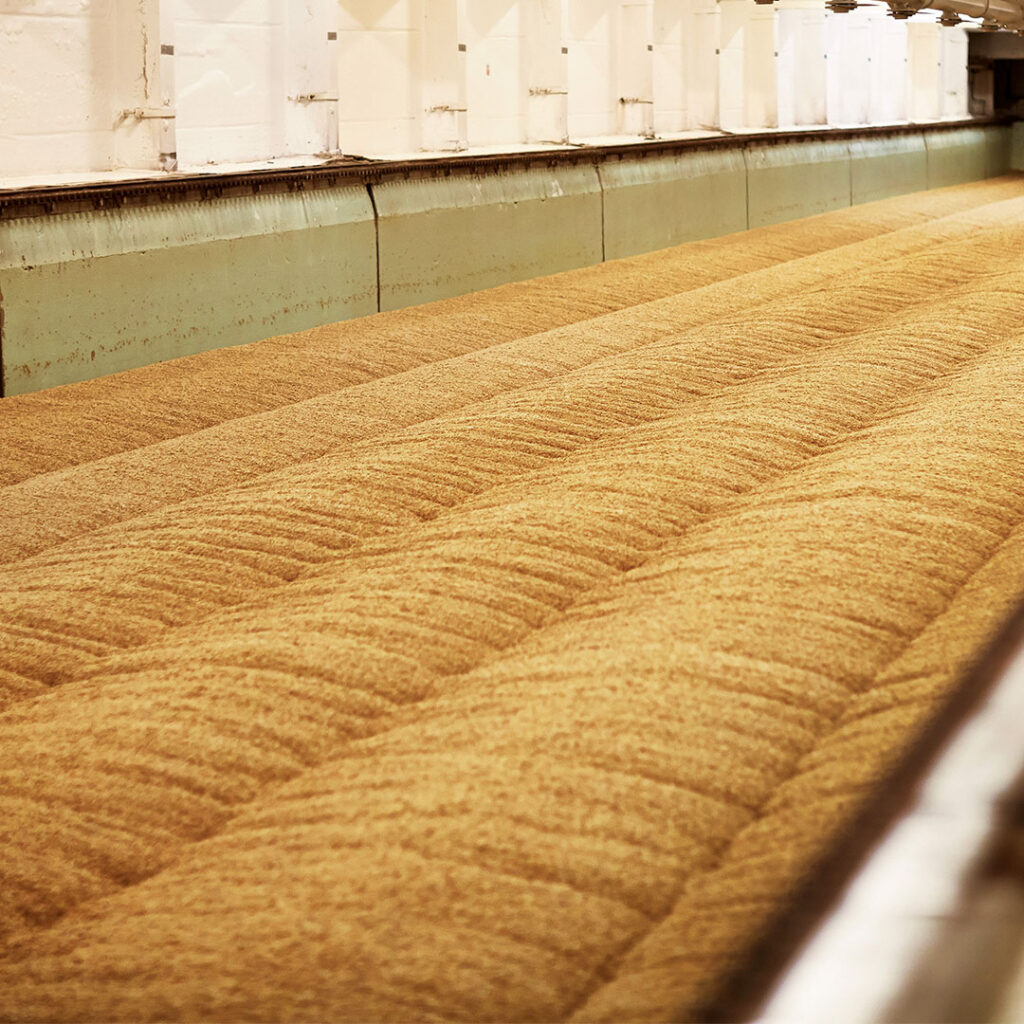
Kilns – Great for base malt, not for caramel
Kilns have been essential in malt production for centuries, but when it comes to caramel malts, they fall short. First, moisture control is inconsistent, leading to uneven saccharification. The bottom layer dries out faster than the top, making it impossible to achieve uniform caramelization.
Moreover, most kilns top out at 80-90°C – too low for proper caramelization. Some maltsters attempt to create lightly stewed “caramel” malts in kilns, but the results lack the deep sweetness and colour of true caramel malt.
Fluidized bed roasters – Fast but dry
Fluidized bed roasters use hot air jets to roast malt quickly, making them excellent for dark roasted malts. However, they strip away moisture too fast, preventing caramel flavours from forming. As a result, while these roasters excel at dry roasting, they fail to produce real caramel malt.
Selecting high-quality caramel malt
Want to ensure you’re getting top-quality caramel malt? Then, ask your maltster about their process. Reputable producers are always happy to share details about their roasting techniques, moisture control, and saccharification steps.
15 EBC
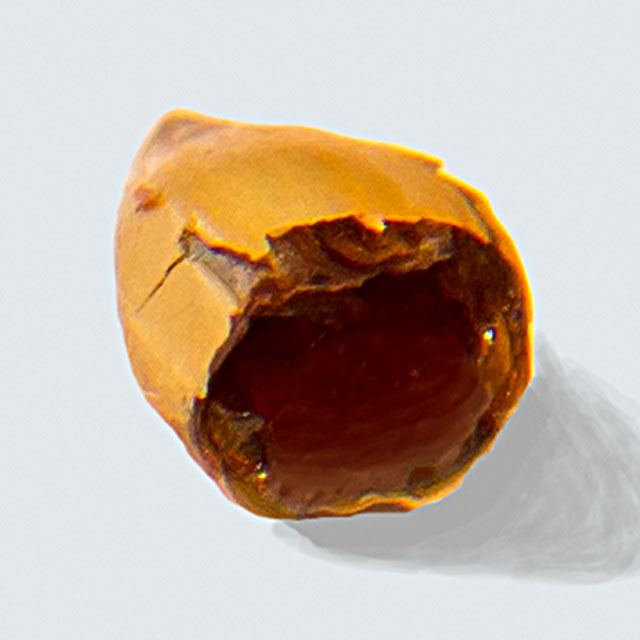
35 EBC
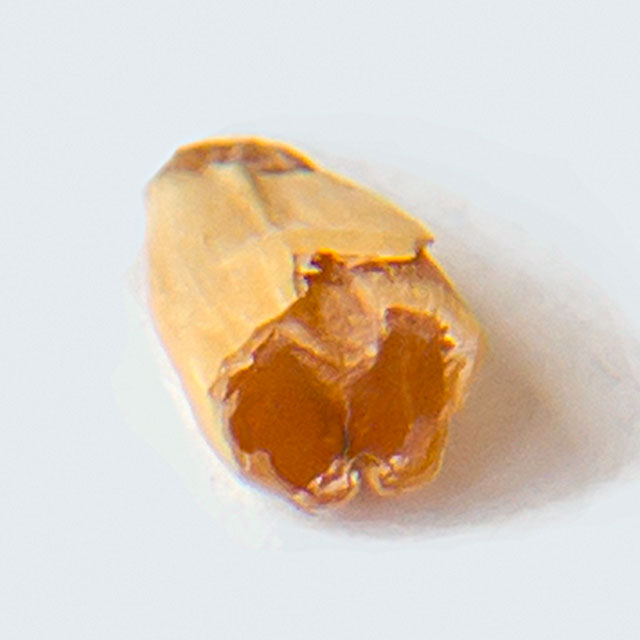
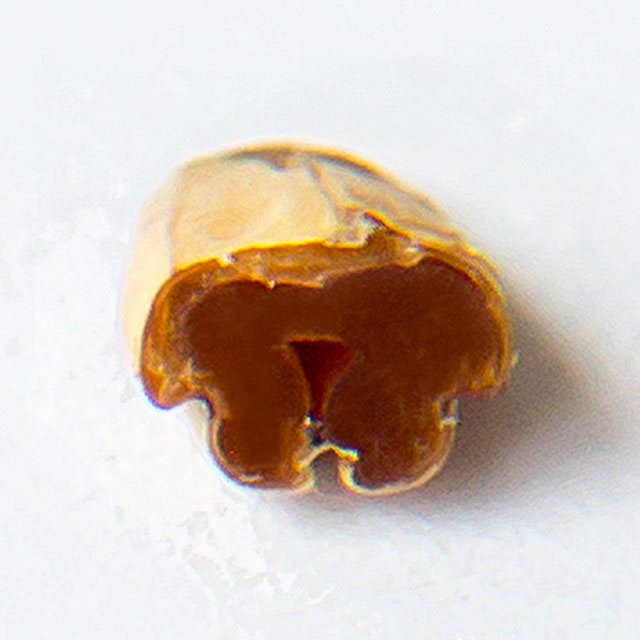
70 EBC
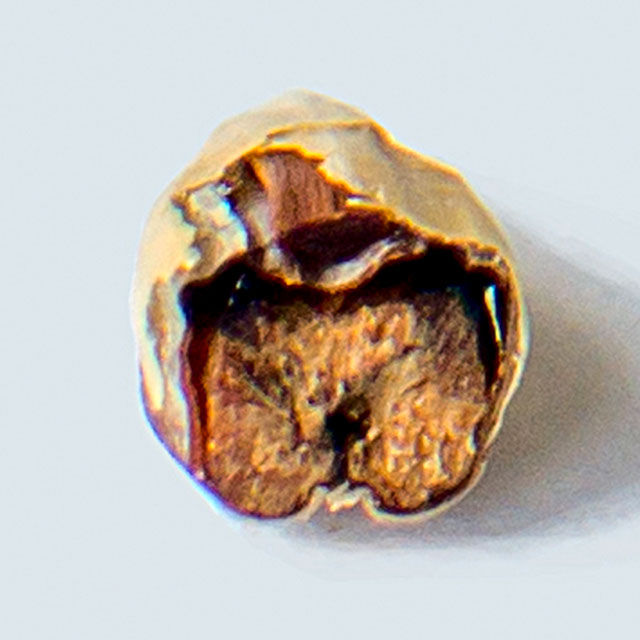
Glossy caramel hues signify thorough saccharification and caramelization.
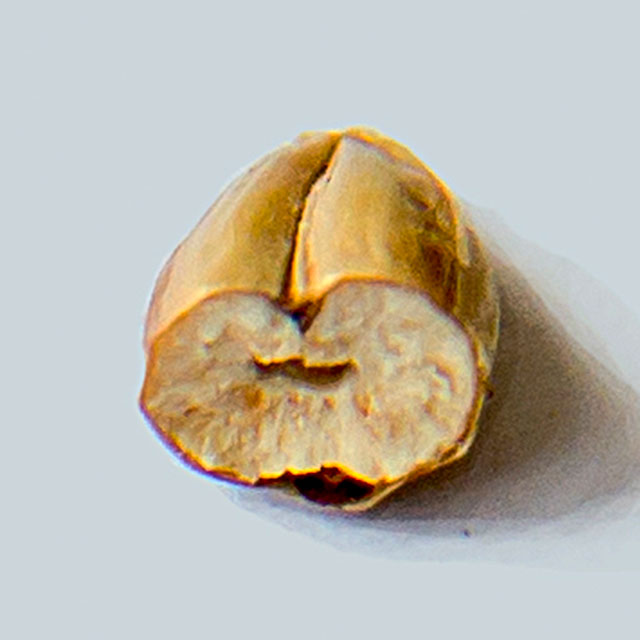
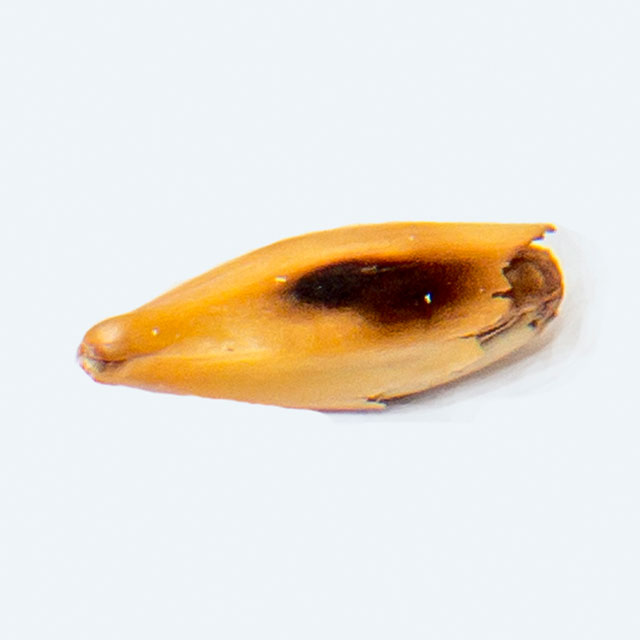
No caramelisation.
No caramel sweetness.
Typical burn marks from uneven heating.
Pale, lacklustre colours indicate inadequate processing.
Inspect the malt kernels for signs of quality – look for a uniform, glossy caramel hue devoid of burnt patches. Upon breaking open a few kernels, absence of unconverted white starch signals complete saccharification. Quality caramel malt emits a sweet, toffee-like aroma, not reminiscent of burnt or stale odours. By scrutinising the malt’s appearance, aroma, and processing techniques, you can ensure the caramel malt was meticulously crafted to impart rich flavour and colour. In conclusion, be sure to remember that roasting techniques have a huge impact.